Art time with Medic – Cardboard Shotgun
Hello everyone! In today’s article, I’m going to show you how to make a shotgun out of cardboard. Why cardboard? Oh, there’s loads of reasons. Although it’s not as sturdy as wood or metal, cardboard is far lighter, cheaper, easier to use, more forgiving if you screw up and it uses old stuff that you were only going to throw away anyway. So, let’s begin!
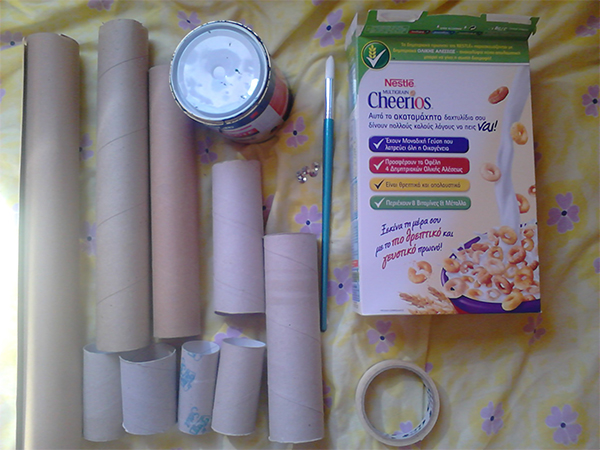
So, what do we need? Lots of stuff, but mostly cardboard tubes. Cardboard tubes are the building blocks of anything that is mostly tube shaped, for, well, um, yeah. Big sheets of cardboard are great, but if you can’t get your hands on that, a couple of cereal boxes will do the trick. We’ll mostly be using masking tape to make this, as you can paint over it relatively easily. Glue and staples can be used as well. A quick note, please ignore my yellow and purple flowery bed. It makes for a great work space, as long as you clean up the cardboard afterwards.

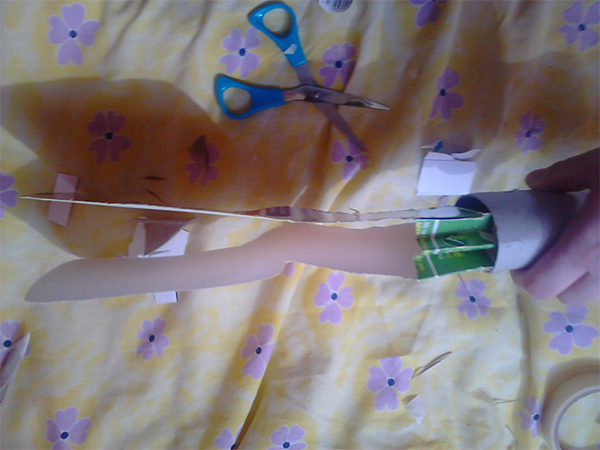
This is what I get after cutting it out. I used the fold of the cardboard box to make an exact copy, like cutting a folded piece of paper. Make sure you leave a little extra on the end.
Now we’ll make the barrel and the pump of the shotgun. We’ll start off with two cardboard tubes. If you can’t find one long enough, tape a couple together, but for the bit attached to the pump, a whole tube is better. You also need a third tube that is big enough to loosely slide along one of the tubes. This is the base of the pump.
Now we’ll build up the pump. Because the tube alone is quite tiny, we’ll stick another tube over it and cut that tube into shape. I shaped this one by cutting diagonally across the tube, then pinching it shut and taping it in place. You can also mold the pump by using modelling clay or taping bits of cardboard onto the tube until you get the desired effect. In order to make the pump not roll around, I cut a small piece of cardboard tube and stuck it to the top of the pump so it runs along the barrel of the gun. A thick piece of cardboard will do the same thing.
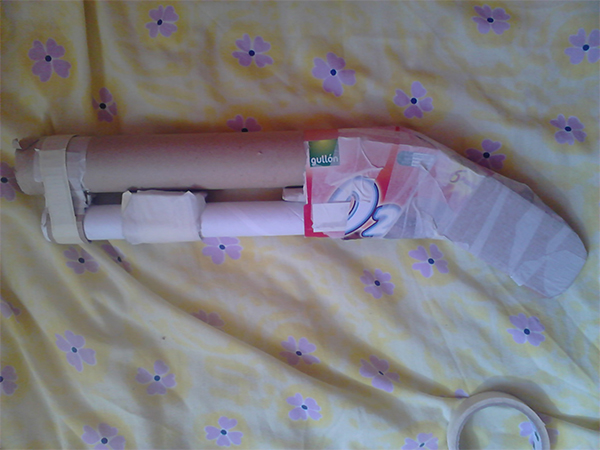
Alright, now we’ve made the pump, we can stick it on the bottom tube. Don’t glue it or anything, just slip it on. You want to make sure it moves around easily but not too much. Now we can stick the tubes together. Get yourself a piece of cardboard, slightly larger than the gap needed between the two long tubes. Stick it to the top of the bottom tube with the pump on it, then attach the top tube. Do the same for the other end, but use a longer piece of cardboard that so that it sticks out from the end of the tubes. This provides a bit of extra strength. For even more strength, cut a strip of cardboard and wrap that around the tubes too, using plenty of masking tape.
With the barrel completed, we can attach the butt to the gun. Grab another, large cardboard tube and tape it halfway to the end of the gun. The other half needs to not contain the barrel, as that’s where we’ll slot in the butt.
Alrighty, time to bulk up this bottom holdy thingy! You can tell how well I know my stuff. At the moment, the butt is all flappy and horrible, so grab a piece of tape and put it on the end, sticking the two sides together but leaving a nice 1-2cm gap of sticky stuff between them. There’s all sorts of ways you can bulk up the inside. On the first shotgun I made, I used all the scrap pieces of cardboard that I was going to throw away. This time round, I’m using folded-up cardboard tubes, which provide a lovely bit of stability and are quick and easy. You can also use cotton wool or tissues or large numbers of sweetie wrappers or whatever you want, as long as it can be made to stay in place. Use extra tape to keep the shape together.
This is one of the trickier parts. Cut yourself some thin strips of cardboard. Run these along the edge of your butt and securely tape it in place. Patience is needed with this, but it doesn’t take long to get used to it. Make sure it’s firmly attached, because this is what keeps the shape of your gun.
All we have to do is slot the two pieces together. Use plenty of tape, using glue and staples and adding extra cardboard for support if needed, to stick the two pieces together. Make sure it’s nice and sturdy, because this attachment is the weakest part of the model. If you want, pour some PVA or wood glue down the gap and leave it to dry before taping it all together. Oh yeah, and to make the trigger shooty thing (which I didn’t take pictures of…), simply get some thick cardboard, bend it into shape and stick it on underneath. To make the actual trigger, get a thick piece of cardboard or plastic (which naturally flicks back after pulling), fold it in half and glue it inside. You can stick a spring between the trigger and the butt of the gun for a more authentic feel.
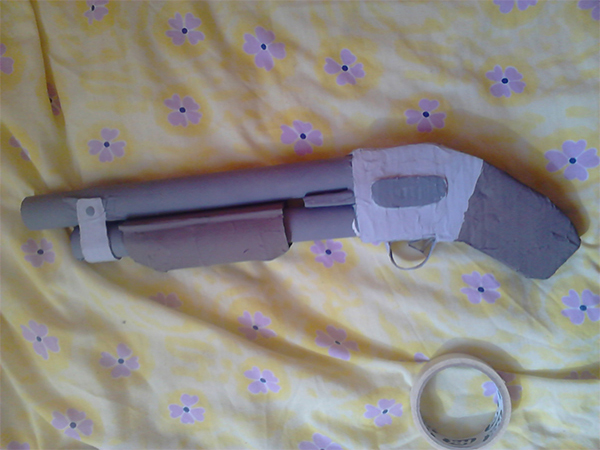
And we’re done! All you have to do is paint it. I recommend using acrylic paints or really thick poster paint. I also recommend giving the whole thing an overcoat of white or grey. You can use spray paint for this but I feel painting it on is more fun. Use a nice, thick brush and really throw the paint on for big, single-colour areas. When doing detail, draw it on with pencil first, and use stencils for any text. Stickers also work out quite well, as well as throwing things into MS Paint and printing them out onto paper (or sticker paper) and cutting it out. For rivets and stuff, I like to use drawing pins, which I glue on using a bit of super glue, but you can do the same with pretty much anything.
Here are two I made earlier. Good luck!


